|
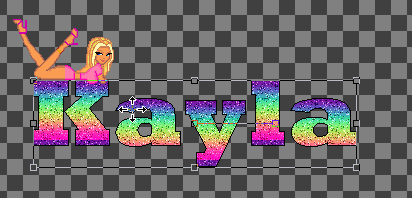
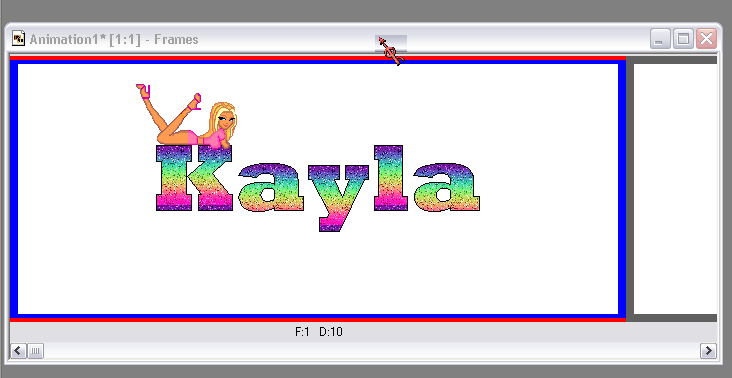
Here's what we're going to make:
You'll Need:
To Make It:
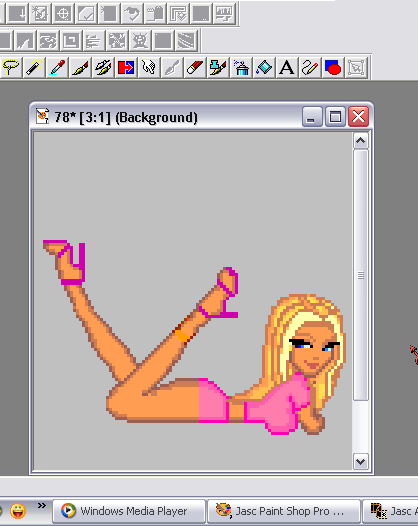
1. You'll need both Jasc Animation shop, and Paint Shop Pro open. Open your doll in Jasc Paint
Shop Pro.
2. Now, if you'll notice, it has VERY few color choices. So, we want to go up to "COLORS" then
scroll down to "INCREASE COLOR DEPTH" and then choose 16 million.
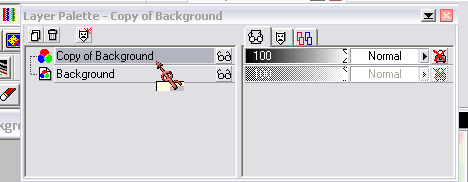
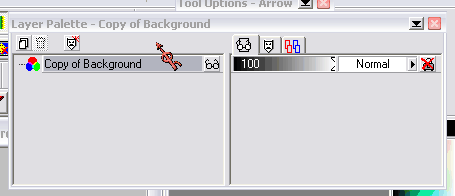
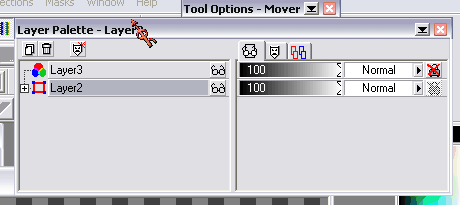
3. Next, (making sure you have your Layer Palette up. If you don't, it can be found under "VIEW>TOOLBARS",
and just check the box that says Layer Pallete, and it will appear) go to your layer pallete, and right click on the layer
that says "Background" and I want you to duplicate it. After that, delete the regular "Background" layer and just leave "Copy
of Background".
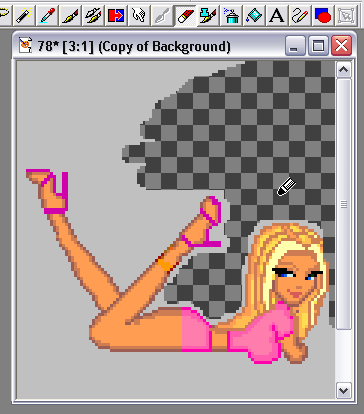
4. Next, go to the "Eraser" tool. (it looks like an eraser...Well...that's ironic) Now, just make all
the area around the doll transparent by erasing the area around the doll. I like to make a big bubble type erase, then go
in and do smaller adjustments. It's up to you how fine-tuned you do it, but it WILL effect your finished product however you
do it. On average, this takes me about ten minutes.
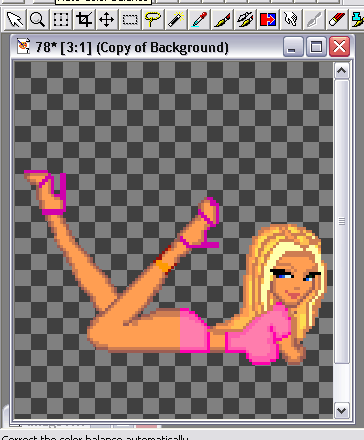
5. Now I like to crop the extra space around the doll that isn't needed. (you can also do this BEFORE
erasing all of the extra color. It'll save some time.)
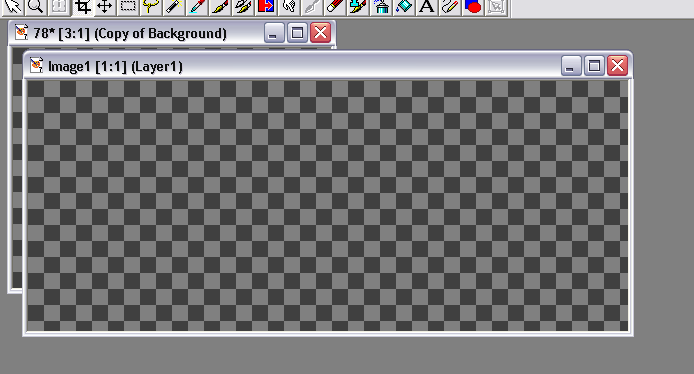
6. Now open go to "New". Open a new blank thing, and MAKE SURE IT'S ON TRANSPARENCY! Mine is 600x250.
That's a good size. Notice that I didn't close the doll.
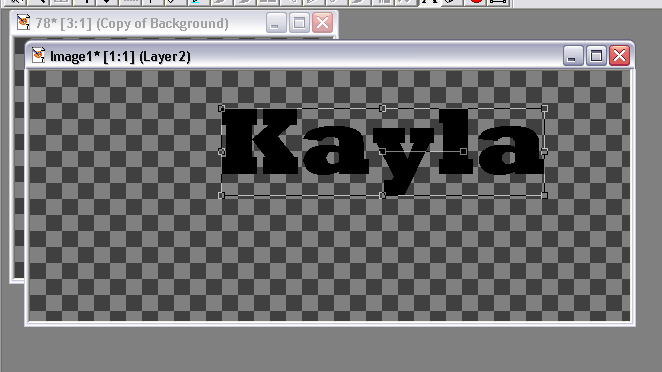
7. Now, add your text onto the blank canvas using the text tool. (It's the little thing with the "A"
on it) I suggest a THICK font. And about size 72 works best.
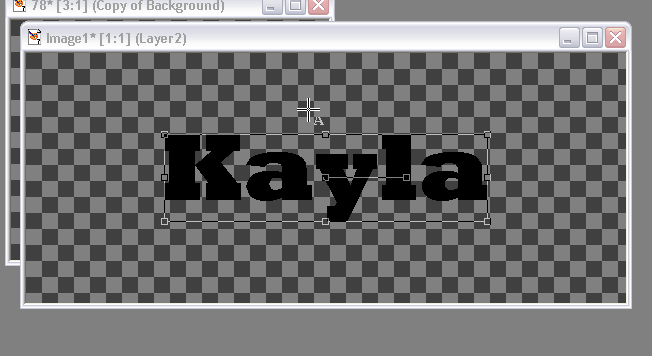
8. Now, just to center it, I like to go up to "Objects>Align>Center In Center".
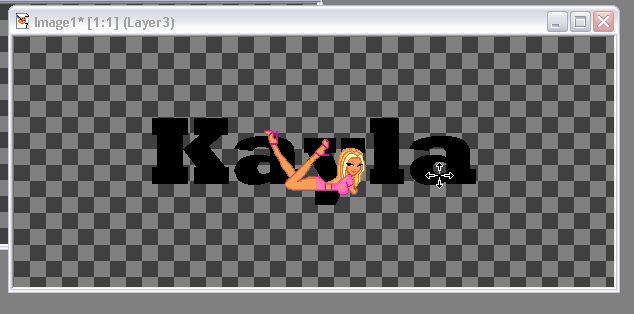
9. Now I want you to go back to your doll canvas again. Right click on her, and click copy. Now, go
back to your name canvas, and right click on it, and select "Paste As a New Layer". Your doll will now be in the Name Canvas.
Drag the doll to where you want it to be.
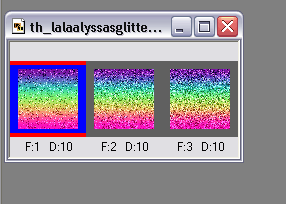
10. Alright..Now go over to Jasc Animation Shop. Open whatever glitter you want to use. Make sure the
glitter is saved on your computer so you can open it. (You can save it wherever you want) If you use the example glitter,
you should have three frames.
11. Next, drag all three frames from Jasc Animation Shop into Jasc Paint Shop Pro. (Make sure when you
drag them into Paint Shop Pro, you drag them onto a grey space)
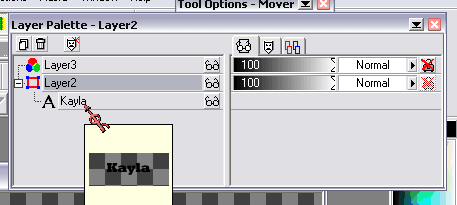
12. Now here is where it can become tricky if you don't know what you're doing. Click back into the
Name Canvas that has the doll on it. Now, go back up to that layer pallete we were messing with earlier. I want you to see
that one has a little plus side beside it. That's the text you added earlier. I want you to click on that plus sign and it'll
show the text you added as a submenu. Right click the submenu and select "Edit Text".
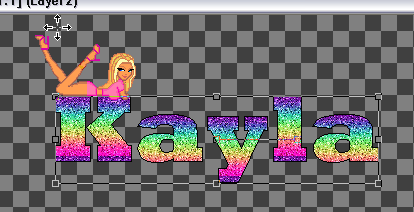
13. I want you to now change the "Fill" box to include your first frame of the glitter you dragged and
dropped into the Paint Shop Pro. Now, click "OK". Then, go and save your project to a file. Repeat these steps again, except
putting in your second glitter frame. Then save this canvas to a different spot. (Different file name, preferable same folder)
Do it once again, using the third frame, and save it. (if there's anymore frames, repeat it until you're done)
14. Now go back into Jasc Animation Shop. (Bet you thought we were done with that?) Go to the "Animation
Wizard", and go through the steps that are needed then add all three (or more) images to the wizard. They should be linked.
Then, crop the extra space around it. Then, you're done and can save it! (If you wish to see it, go to "VIEW>Animation".
I hope this tutorial was helpful to you. If you have any questions, contact me:
YAHOO: kaycar11
AOL/AIM: cutieb11kay
LIVEJOURNAL: www.livejournal.com/users/kaycar11
|